Bonnie's Facelift

fender

Street Tracker
Thanks for the videos. It really helps to see how it's done beside just reading about it. Looking forward to the next video on how to do the springs.

Nothing like having the right tools for the job. After seeing how easy it was to break the nut with the electric impact driver I need to get one.
 

B06Tang

Cafe Racer
Another killer video, Matt. One thing I've found that YouTube lacks are instructional videos of our modern Bonnevilles. And for those that have not seen the insides of their cases before, it takes the mystery out of it and shows that it really isn't rocket science. Provided you can read and understand an owner’s manual... A lot of times I'll read, watch and run thru the process several times in my head before I crack the first bolt.

Thanks for taking the time to shoot it and post it up. I know it's challenging to shoot videos when you want to just get in, fix it and get out again.

I am the same way when it comes to learning...I love to read but I am definitely a visual type of learner. The audio really sucked in the Bonnie Intro video, first time doing it and still learning the knick-knacks, but I explained in there that the motivation for me to do this was that there wasn't shit on youtube when it came to Hinckley Trumpets. Like you, I read the hell out of my manuals all the time but if I can add a video to my reading, then that helps me out a lot. Have you checked out lunmad's youtube page? He has a Meriden T120R OIF but the guy is a freaking genius on a wrench. I get lost watching his videos and I find it surprising the similiarities with the Meriden & Hinckley Bonnies...I find it kind of fun dissecting the differences of the two:playin: I've used his videos to help me out a lot when I was first starting to wrench on my bikes and it was a good enough reference for me to step forward. I guess he is the one that gave me the idea for our Hinckley scoots plus if I can do this shit LITERALLY as a backyard operation, then all you guys should be rockin' it with the kick-ass garages you all have! :finger2::rant: Here is lunmad's youtube page if you never checked out: http://www.youtube.com/user/lunmad


Thanks for the videos. It really helps to see how it's done beside just reading about it. Looking forward to the next video on how to do the springs.

Nothing like having the right tools for the job. After seeing how easy it was to break the nut with the electric impact driver I need to get one.

They had that on sale on craftsman site for $63! That is a freaking awesome price if I never use for anything other than my car tires. Make sure if you are getting one that you cover the newton-meter ranger on the bike. The highest nm is at front sprocket nut that is set at 132nm. The impact driver I picked up is rated at 135nm so it will have to put it's big boy pants on if I ever have to do something with that but it is plenty powerful enough for the rest. The next highest torque bolt is the alternator rotor bolts @ 120nm, the the swingarm and then the clutch @ 105nm. After that though...there are pretty big drops on the torque amounts on our bikes so it's not something you would use everyday but MAN it is nice to have when you need it!

I'm glad you like it and keep watching as I'm doing a self-prescribed fleecing of my bike because my riding is going to be limited this year. This is what I am still doing:

Clutch springs
fork oil
fork springs
head bearings (I might hold off if my bar still feels good but right now I have it on the list)
Alt cover side is off so I'm doing valve clearance check as described by the manual using the 10mm bolt and not rotating the rear wheel
Oil change (yes...I am making real basic/simple items too)
Carb synch when all of it is buttoned up

Keep watching and I'm glad you are enjoying it! :cheers:
 

klem

Scooter
BO6Tang
Thanks for the videos it is good to have a visual when learning about bike maintenance i am looking forward to the valve clearance check i will be doing mine in time and to have a visual on that would be great.
There should be more videos on Bonneville maintenance imo we would do a lot of work of our own if we could just see how it is done.
Cheers KlemK.
 

B06Tang

Cafe Racer
BO6Tang
Thanks for the videos it is good to have a visual when learning about bike maintenance i am looking forward to the valve clearance check i will be doing mine in time and to have a visual on that would be great.
There should be more videos on Bonneville maintenance imo we would do a lot of work of our own if we could just see how it is done.
Cheers KlemK.

I am glad you are getting something out of it! That is exactly the reason why I take a little bit of time and throw these clips together. I'm also going to bleed my brake lines too that I didn't add to the list above. I've always done the reverse bleeding method...I just think it easier to do that way. So stay tuned if you haven't don't that before either!

I agree with the lack of videos for the Hinckley rides on youtube. The Meriden gang seems to be really good about that but I think the "old timers" were a hell of a lot more resourceful on working on their own bikes. It seems the Hinckley crowd has fallen more into the "bolt on" pieces and go type riders. So I figured if I was hunting for it on youtube, then there had to be others as well wanting to see this stuff. I am military overseas AND I'm not on a Harley...you can add up the amount of people that groove on Brit bikes with me over here :lol3: So throwing up these videos is fun for me because I can share this shit with others that dig the same ride I do.
 

Twodogs

Street Tracker
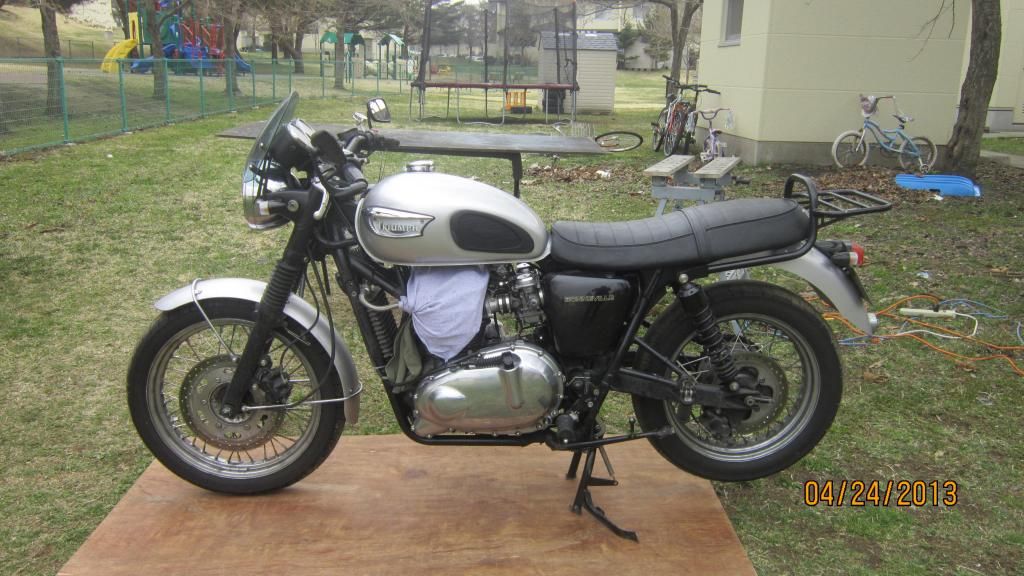
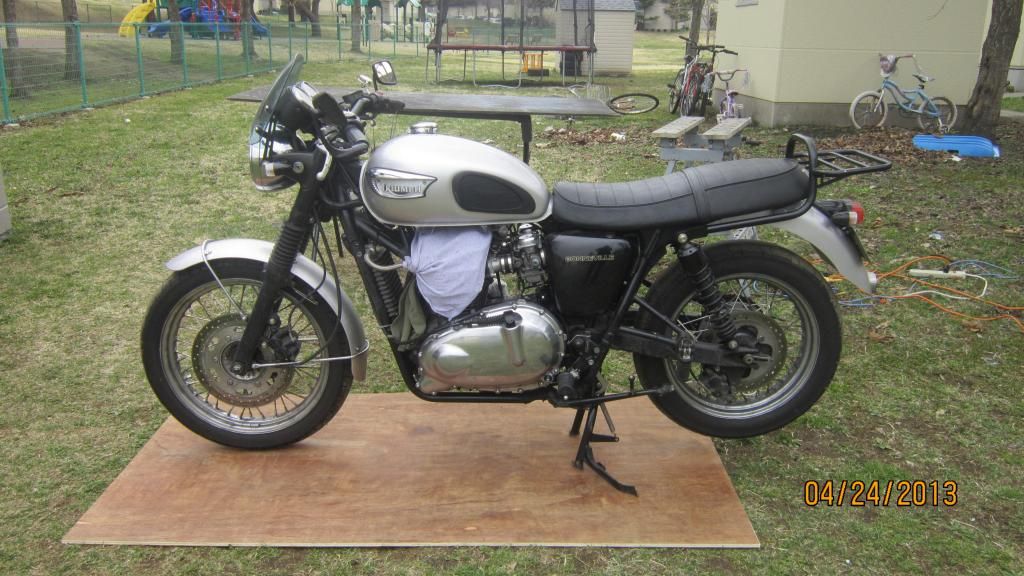
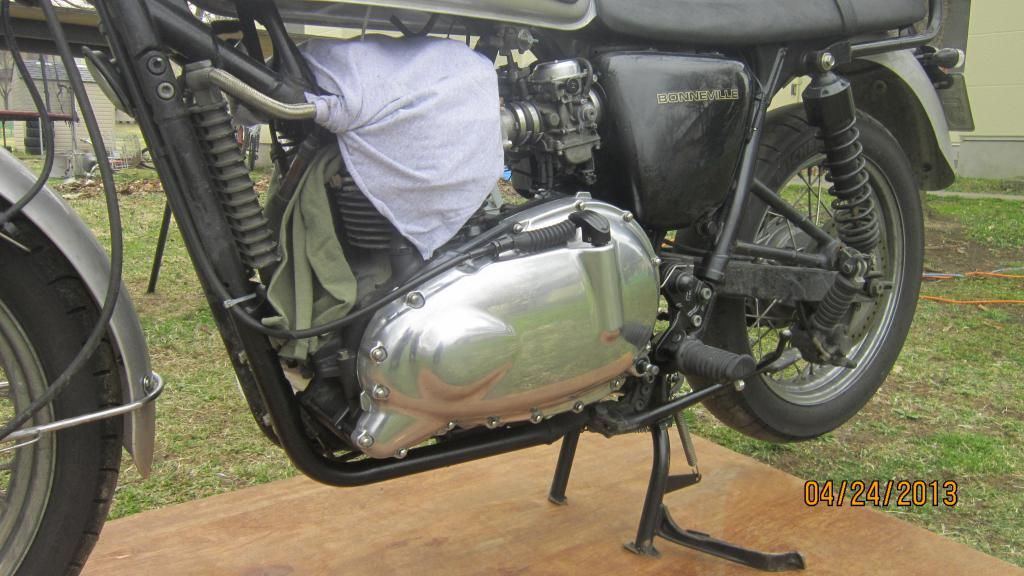
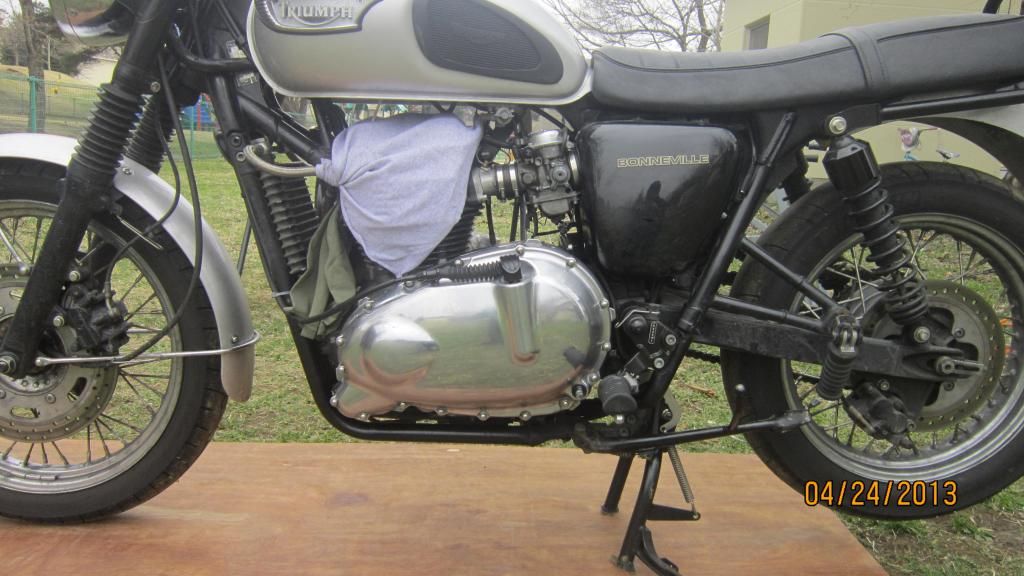
I am SUPER stoked with how my covers came out. It was kind of a forced decision for me to do because that lacquer finish really got chewed up over here. I contemplated having them powder coated but there isn't any service like that where I am at so I thought I would try to the old school way and get to work. I have well over 24 hours in wet sanding on all three covers combined but they are like glass now! I think it looks a shit ton better than chrome. I polished them up with a real thick layer of metal polish cream and then I buffed them out with a thick coat of wax. I am kind of experimenting to see what lets them hold up the best. I do NOT plan on pulling these covers every season to do this kind of work. They will be cleaned, polished and buffed while still on the bike after this but I really do like this finished product.


A few reasons:

#1 It is a 2007 and the first time this cover has ever been opened as far as I know (this is my third year of ownership).

#2 I am pretty demanding on my bikes and ride rather aggressively

#3 I'm 6'5 @ 230 pounds and I put about 20,000 miles in a six month riding season

#4 It started to feel a little sluggish in 4th and 5th towards the end of the season last year.

Finally, the cover was coming off because of the condition they were in so the timing was there to do it. I definitely wanted to go with the green springs because of what I just stated and I felt that I might as well do the plates too. I'm also putting a new clutch cable on it and I will throw the one on it now in my bag in the event I ever have a road side emergency. Plus...with every thing going on personally with me...I doubt I will be able to put the miles on me Bonnie that I normally do so it is a nice substitute to at least wrench on it with some tunes playing in the background.

I had slippage between 4th and 5th, checked out the clutches and found very little wear to the disc or plates (measuring everything with a micrometer) but I had already bought a Barnett performance kit so I thought bugger it I will fit it. Slippage was gone from the 4th to 5th but I had this horrible jerky feeling at take off. I ended up removing the clutch pack and fitting heavier springs (unfortunately I was stuck with the clutch pack because I got it from the States) The jerky take off was gone and the slippage between 4th and 5th was gone as well. The cost I spent on the clutch pack could of been better spent else where. Be careful not to loose the little washer on your starter gear.
 

B06Tang

Cafe Racer
I had slippage between 4th and 5th, checked out the clutches and found very little wear to the disc or plates (measuring everything with a micrometer) but I had already bought a Barnett performance kit so I thought bugger it I will fit it. Slippage was gone from the 4th to 5th but I had this horrible jerky feeling at take off. I ended up removing the clutch pack and fitting heavier springs (unfortunately I was stuck with the clutch pack because I got it from the States) The jerky take off was gone and the slippage between 4th and 5th was gone as well. The cost I spent on the clutch pack could of been better spent else where. Be careful not to loose the little washer on your starter gear.

Same thing happened to me...I got everything off and the plates measured out fine. I already have and putting the green springs on it though. I elected to leave the OEM plates on the bike because I plan on putting a sidecar on my '06 when I get back to the states and figured I could put the plates to good use then for that bike.

I should of mentioned it in my video but first thing I did was take the wavy washer off and put it into one of my parts drawer and closed it tight! :nose::banana:
 
jerky take off was gone and the slippage between 4th and 5th was gone as well.

This was achieved by going back to the stock plates with heavier springs?

I have slippage between 4th and 5th gears as well. I have the 'Green' springs and was planning on doing the swap within the next couple weeks.
 

B06Tang

Cafe Racer
Hey Chris...have you gotten to your plates yet? I am betting, like mine, your plates will measure out within specs and you will be fine doing just the springs.
 
Hey Chris...have you gotten to your plates yet? I am betting, like mine, your plates will measure out within specs and you will be fine doing just the springs.

No, I haven't purchased plates yet. I think the plates are fine and just need springs replaced. I've got the green springs and just waiting to do an oil change/spring change at the same time.
 

B06Tang

Cafe Racer
Cam Cover Problem

I started to do my valve clearance checks and ran into this problem with my cam cover. If you are like me and doubled up on your bolt seals to cure the weeping problem...then you should have a look at this video. This sucked but I guess it was good to find the problem...back to ordering and waiting on the freaking mail...:mad2:

http://www.youtube.com/watch?v=R3qL6XC8URA


*anyone thinks it's a good idea to share on the "other" site then feel free to do so. I know I have suggested numerous times in doubling up washers to cure the weeping dilemma.
 
Last edited:
Matt,

I have the Haynes manual for Bonneville, T100, Speedmaster, America, Thruxton & Scrambler '01-'12 and shows torque settings for the valve cover at 14NM.

Good catch on the issue with doubling up on washers. I've had my cover weep a couple times now. With the last weep, I replaced the spacer/washers with the new redesigned spacers/washers and haven't had a weep yet. And that was over 6,000 miles ago.

I know it can be frustrating to stop progress with waiting on parts. Just feel fortunate that the underside of your valve cover didn't fall into the motor. That sounds like it was a really close one.
 

B06Tang

Cafe Racer
I know it can be frustrating to stop progress with waiting on parts. Just feel fortunate that the underside of your valve cover didn't fall into the motor. That sounds like it was a really close one.

I do realize that I am VERY lucky...just a little frustrated right now. I know when it happened...the eyelet popping off. It was when I was gently tapping on the cam cover with my rubber mallet to break the vacuum when I first got it off. So at least I know that wasn't rattling around when I was riding the bike. This could have been MUCH worse than what it is. I just dropped the order on new bolt seals and black cam cover...:woot:
 

B06Tang

Cafe Racer
I just ordered a black cam cover for a '09 America :hj: according to pinwall. But...a $117.00 cover is only costing me $40. Now just wait on the pony express to make the swim across the Pacific.

I also ordered the new cam bolt seals (T1260337). I believe you Chris when you tell me this is the ticket so I am looking forward to getting them. It certainly has to beat doubling up washers :shrug:

I also went ahead and dropped the order on T3880330; the locking pins and spanner. My paddy senses are kicking in telling me that I am going to have to change out shims with how things are going. When I get back stateside I guess I will have a Guinness charge for anyone living in the area and need to use a slew of any of these tools...oh well...good investment for having two Bonnies in the shed:beer:
 

JimmyR

Street Tracker
Oh I know well the pain of waiting for parts! Try living in Australia...

I think Guinness is a great idea. A good draught Guinness is a thing of joy and probably the perfect tonic to working on a Trumpy.
 

klem

Scooter
Do the new Bonnies have the same problem with those bolt seals??
Do the Americas have the same cam covers as the bonnevilles??
 

B06Tang

Cafe Racer
Do the new Bonnies have the same problem with those bolt seals??

I'll try not to be long winded so here it goes...

It is not a carbed/EFI Bonnie issue...it is a bolt seal issue. The OLD cam bolt seals (I'm leaving the part # out of this on purpose) were not thick enough as I explained in the video. This caused a fraction of a measurement on the cam cover but it was enough to make it weep. Anyone that has owned a Bonnie for a few years probably could tell you that their cam cover wept in which both mine did.

Triumph has fixed this problem. The new bolt seal is T1260337 in which Triumph remedied the issue by increasing the thickness to it. The weeping problem has been corrected when Triumph fixed these bolt seals. If your cover isn't weeping, then I would bet my Guinness supplies that you are good to go. I came to Japan from an assignmet in England and I knew parts would be a pain in the ass so I stocked up on plenishable items. The bolt seals were one of them so I had an inventory of the old seals and so...the weeping issue continued. I now have the new & fancy bolt seals on order:cheer:

Do the Americas have the same cam covers as the bonnevilles??

Yes...pinwall had advertised as a cam cover only for an '09 America but it doesn't matter. These cam covers run the modern classic range. The differences on the part numbers would only be for color/chrome. But I'm not complaining that pinwall does that...finding black covers can be tricky and who knows....it might have made someone owning a Bonnie back off from ordering it. $40 for a cam cover is a pretty good deal:headbang2:
 

normandy

Street Tracker
Regarding the shimming of the thin washers, double was probably way more than you needed. I also shimmed my washers to stop a weep but used flat washers and it worked great. They don't require more than 1/16".

Anyway, glad you got it sorted.
 

B06Tang

Cafe Racer
I buttoned up the clutch cover today and put that all back together. Working on the video for that project and will post up later. Here are some pictures of the covers though and holy shit do they all kinds of awesome!!!!!!!!!!!!!!!! I know I shouldn't be gloating but if you knew how many hours I put in wet sanding, then you would be gloating too! I am really loving how this looks


Top