Son of a ...

rodburner

Rocker
Thought I had this thing all worked out and went for a pleasant ride this afternoon....All is well until I hit the first big chuck hole,then bam,the back tire hits the bottom of the battery box.I am startled,then start laughing my ass off.
Almost 5 inches of wheel travel ! Gonna make another new box tomorrow,to relocate the A123 packs and ride the SOB again....
jeris514.jpg
 
Last edited:

rodburner

Rocker
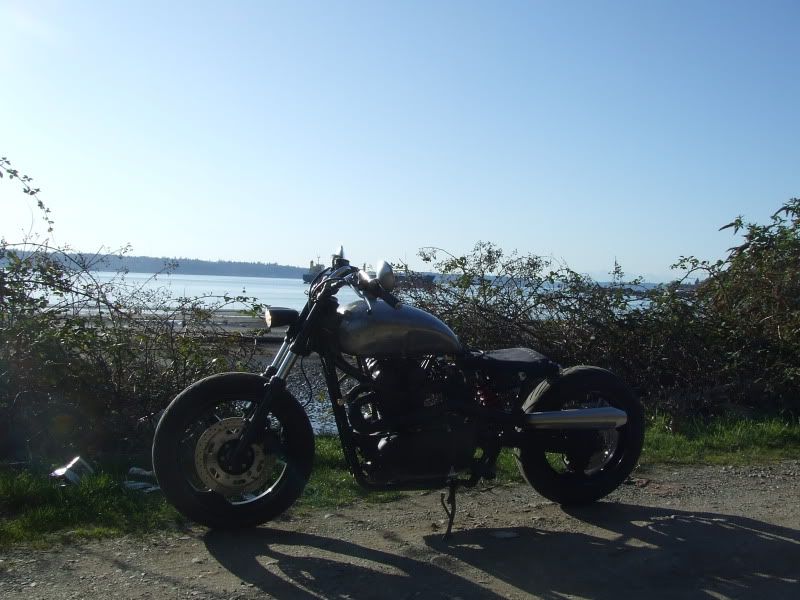
The ride is soft. I have it cranked up to full preload and full stiff damping and it still sags almost 2" when I sit on it..I don't think the Showa has a replaceable spring,so I'll probably just get a different shock. But on the freeway,mmmmmm.
Oh,and the travel is closer to 5",cuz I didn't factor in sag and wheel arc.Sorry.
 

rodburner

Rocker
Thanks.
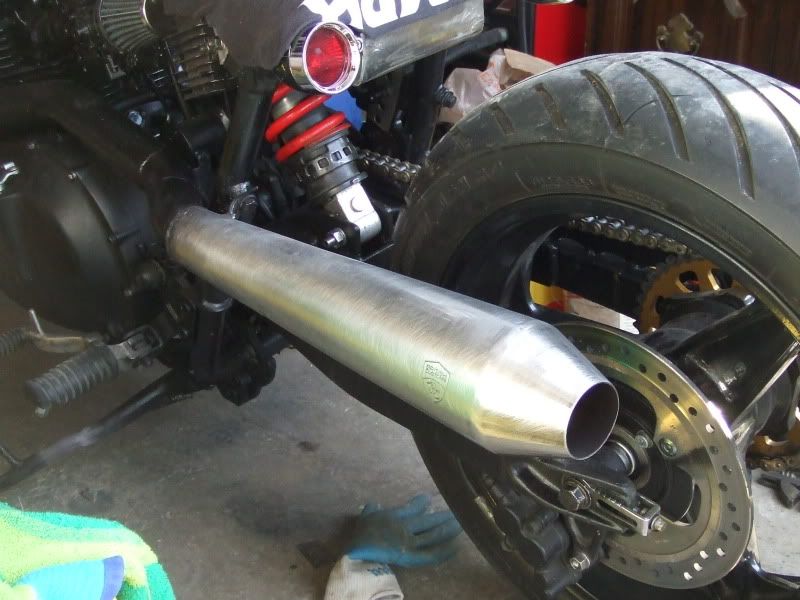
And Sweat,that can rocks. I'd like to hear it from an onlookers perspective,cuz it sounds like a Predator from the seat. A nice bump in the midrange too.More so after I knocked that silly polished look off..:C
jeris515.jpg
 

KiwiRat

Scooter
1 1/4" sag on the rear is what you should be aiming for, and about 1' on the front.

Rear sag is the most crucial of the two.
 

coopv2

Street Tracker
I know I have the math somewhere in my old riggers book but its in the bottom of a box under a bunch of boxes, somewhere.
as a guide using the axle as a starting point and marking the shock mount as 80kg (spring pressure of the shock) each centimeter towards the swingarm pivot shaft add 10kg to the spring pressure required. by the look of your bikes rear fork. 1 foot or 30cm from your old shock mount to your new mount would math out at 80kg + 300kg = 380kg spring.
before the braniacs jump in with a complex tirade on fulcrum and leverage dynamics (whatever) this was just a guide formed by my booze damaged brain and may contain errors that if swallowed could choke a cat.
 

KiwiRat

Scooter
Stroker,

try this method.

FIRST THINGS FIRST: SETTING STATIC SAG

Although this isn't strictly a riding technique there's a lot of false information about the 'correct' set up for a bike's suspension. The one main thing that most of these articles miss is the most crucial - setting the sag correctly.
The sag range will be the same for everyone but some of you will find that you will need to change springs to get into that right range. Race bikes, generally, need harder setting than road bikes as they ride on smoother surfaces. Road bikes have a huge range of dips, bumps and potholes to cope with so need to set slightly softer.

Most riders will have different preload settings, thanks to weight differences, but all will need to be in the same range for the suspension to work at its optimum range, namely its middle third.

Without the sag set right the damping will never be able to work at its best, as it will be trying to overcome the effects of a badly set spring. Don't forget that production bike suspension systems are designed to work with a hugely varying type of rider on board. It has to cope with very heavy riders to very light riders as well as aggressive riders to steady riders and all points and weights in between.

Therefore, a comprimise is required.

So what is sag? There are two types, Static and Loaded. Static sag is the amount the bike settles under its own weight. Loaded sag is the amount the bike settles with a rider on board.

To check that you have the right rate of spring you will need to set both the static sag AND the loaded sag, just doing one or the other is only getting half the story.

Here's what you will need to check and set your sag.

• A tape measure.

• A pen and paper.

• Tools to adjust the front and rear preload.

• Three strong friends.


STATIC SAG

Setting the static sag is easier than the loaded but it will still need a set of strong hands to keep the bike off the floor while you take your measurements. Lift the back wheel of the bike off the floor by pulling the bike over on its side stand, or putting it up on the centrestand.
Now, using your tape measure, take a reading from the centre of the rear wheel spindle to a point on the tailpiece that is directly above the spindle. It will be helpful to mark that point on the tailpiece for the future reference.
Write down the measurement and we will call this reading A.

Measurement A will remain the same throughout the procedure so you only need this reading once. Now put the bike back down on its wheels and hold it upright. You will see the bike settle under its own weight. Measure the distance from the spindle to the tailpiece. We will call this reading B.

Subtract B from A. This is your rear static sag. Keep a note of it just in case you want to change it back. Ideally you are looking for 5-10mm on a race bike and 15-20mm on a road bike.

Either compress or loosen off the spring to get into this range. The adjuster is normally a pair of rings on top of the spring. One of them is a locking ring and the other is the adjuster. You will need a C-spanner to make the adjustment. If you don't have one then a hammer and drift will do.

Now lift the front of the bike off the floor using the same side stand method. Measure from the bottom yoke to the top of the stanchion. We will call this measurement C. Like measurement A this will remain the same throughout.

Drop the bike back onto two wheels and take the reading again. We will call this D.

Subtract measurement D from C. This is your front static sag reading. Keep a note of it just in case you want to change it back. Ideally you are looking for 10-20mm on a race bike and 20-25mm on a road bike. Either compress the spring or loosen it off to get in this range. The adjuster is the bit which pokes out the top of the forks, or if if the front is non-adjustable, change the length of the spacer.

LOADED SAG

If all is well we have managed to get within range but this isn't the whole story. We now need to take into account the rider's weight.

Sit on the bike and have one friend steady the front, one steady the back and the other ready to measure. Sit the bike upright. Now WITHOUT touching the front or rear brakes bounce up and down a few times in the seat and then assume your normal riding position. Measure the rear of the bike as before and we will call this measurement E.

Subtract E from A and this gives you your rear loaded sag reading. Try and get between 20-25mm on a race bike and 30-40mm on a road bike by adjusting the preload as before.

Now do the same for the front. We will call this measurement F.

Subtract F from C and try to obtain 25-35mm on a race bike and 35-50mm on a road bike.

If you can't get in these ranges for BOTH Static and Loaded then you will need to change the spring for a harder or softer one. Harder if you're outside the range and softer if you are inside the range.

Good luck.
 

ivar

TT Racer
The ride is soft. I have it cranked up to full preload and full stiff damping and it still sags almost 2" when I sit on it..I don't think the Showa has a replaceable spring,so I'll probably just get a different shock. But on the freeway,mmmmmm.
have you considering altering the shock angle/placement? Getting it more vertical should make the rear stiffer.
(just a thought, knowing how you usually "work with what you got" instead of buying new parts all the time..)
 

jphickory

Banned
KiwiRat -
It is great service when someone takes the time to post information that is useful and carefully explained. Well done and thanks for your post.
 

rodburner

Rocker
have you considering altering the shock angle/placement? Getting it more vertical should make the rear stiffer.
(just a thought, knowing how you usually "work with what you got" instead of buying new parts all the time..)
Hey Ivar. This newer version is very upright, and I put on the longer shock too. I haven't gotten to ride it yet,but its MUCH firmer than the 600s shock.
I think it will work ok.
Steve
 

KiwiRat

Scooter
KiwiRat -
It is great service when someone takes the time to post information that is useful and carefully explained. Well done and thanks for your post.

The pleasure is all mine. It's all about helping to keep those tyres in contact with the road.
 
The pleasure is all mine. It's all about helping to keep those tyres in contact with the road.

Actually you forgot to include the first part of that article:-

And the following is an excerpt from a
thread entitled ‘Setting up the suspension for an 02RC?’ on motorush.net. The
author’s username is redriderrc51:
<<Although this isn't strictly a riding technique there's a lot of false information about the 'correct'
set up for a bike's suspension. The one main thing that most of these articles miss is the most
crucial - setting the sag correctly.
The sag range will be the same for everyone but some of you will find that you will need to
change springs to get into that right range. Race bikes, generally, need harder setting than road
bikes as they ride on smoother surfaces. Road bikes have a huge range of dips, bumps and
potholes to cope with so need to set slightly softer.
Most of you will have different preload settings, thanks to your weight but all of you will need to be
in the same range for your suspension to work at it's optimum range, namely it's middle third.
Without the sag set right the damping will never be able to work at it's best, as it will be trying to
overcome the effects of a badly set spring. Don't forget that your pride and joy has been designed
to work with a hugely varying type of rider on board. It has to cope with very heavy riders to very
light riders. Aggressive riders to steady riders and all points and weights in between.
A compromise? Damned straight!
It's amazing that people will spend hundreds, even thousands of dollars on suspension
components and twiddle with them all day and night but never take the time to set the sag
correctly and never get the bike handling any better!
So what is sag? There are two types, Static (free) and Loaded (rider/race/static). Static sag is the
amount the bike settles under it's own weight. Loaded sag is the amount the bike settles with a
rider on board.
To check that you have the right rate of spring you will need to set both the static sag AND the
loaded sag, just doing one or the other is only getting half the story.
Here's what you will need to check and set your sag.
A tape measure.
A pen and paper.
Tools to adjust the front and rear preload.
Three strong friends.
Static Sag
Setting the static sag is easier than the loaded but it will still need a set of strong hands to keep
the bike off the floor while you take your measurements. Lift the back wheel of the bike off the
floor by pulling the bike over on its side stand.
Now, using your tape measure, take a reading from the center of the rear wheel spindle to a point
on the tailpiece that is directly above the spindle. It will be helpful to mark that point on the
tailpiece for the future reference.
Write down the measurement and we will call this reading A.
Measurement A will remain the same throughout the procedure so you only need this reading
once. Now put the bike back down on it's wheels and hold it upright. You will see the bike settle
under it's own weight. Measure the distance from the spindle to the tailpiece. We will call this
reading B.
Subtract B from A. This is your rear static sag. Keep a note of it just in case you want to change it
back. Ideally you are looking for 5-10mm on a race bike and 15-20mm on a road bike.
Either compress or loosen off the spring to get into this range. The adjuster is normally a pair of
rings on top of the spring. One of them is a locking ring and the other is the adjuster. You will
need a C-spanner to make the adjustment. If you don't have one then a hammer and drift will do
(animal!)
Now lift the front of the bike off the floor using the same side stand method. Measure from the
bottom yoke to the top of the stanchion. We will call this measurement C. Like measurement A
this will remain the same through out.
Drop the bike back onto two wheels and take the reading again. We will call this D.
Subtract measurement D from C. This is your front static sag reading. Keep a note of it just in
case you want to change it back. Ideally you are looking for 10-20mm on a race bike and 20-
25mm on a road bike. Either compress the spring or loosen it off to get in this range. The adjuster
is the bit wot pokes out the top of the forks. Use a suitable spanner or socket to adjust them.
Loaded Sag
If all is well we have managed to get with in range but this isn't the whole story. We now need to
take into account your weight!
Sit on the bike and have one friend steady the front, one steady the back and the other ready to
measure. Sit the bike upright. Now WITHOUT touching the front or rear brakes bounce up and
down a few times in the seat and then assume your normal riding position. Measure the rear of
the bike as before and we will call this measurement E.
Subtract E from A and this gives you your rear loaded sag reading. Try and get between 20-
25mm on a race bike and 30-40mm on a road bike by adjusting the preload as before.
Now do the same for the front. We will call this measurement F.
Subtract F from C and try to obtain 25-35mm on a race bike and 35-50mm on a road bike.
If you can't get in these ranges for BOTH Static and Loaded then you will need to change the
spring for a harder or softer one. Harder if you're outside the range and softer if you are inside the
range.>>

Taken from a PDF file downloadable here:-

RC51_FAQ.pdf.doc

Don't know why but after downloading the file you need to rename it to "RC51_FAQ.pdf" by taking the ".doc" bit off the end then it will open in Adobe Reader.
 

KiwiRat

Scooter
The version I had read was a couple of generations after that, so had been tweaked somewhat, but yes that would be the same text.
 
Top