D9
Vendor
Required items... Bonneville America / Speedmaster finned sprocket cover ($15 on fleabay) bench vise, various wood blocks, hacksaw, coping saw,
angle grinder, flex shaft tool and grinding burrs, portable drill with flap wheel, safety googles, gloves, ear protection.
If refinishing the cover add aircraft stripper, PVC gloves, coarse and fine scuff pads.
I'd estimate the project difficulty level as moderate.
I started by stripping the cover, with plans to polish and chrome the finished piece. Several applications
of Aircraft stripper were necessary to remove the factory finish, with scuffing required between applications. If
stripping, roughen the surface thoroughly first as the stripper will be more effective.
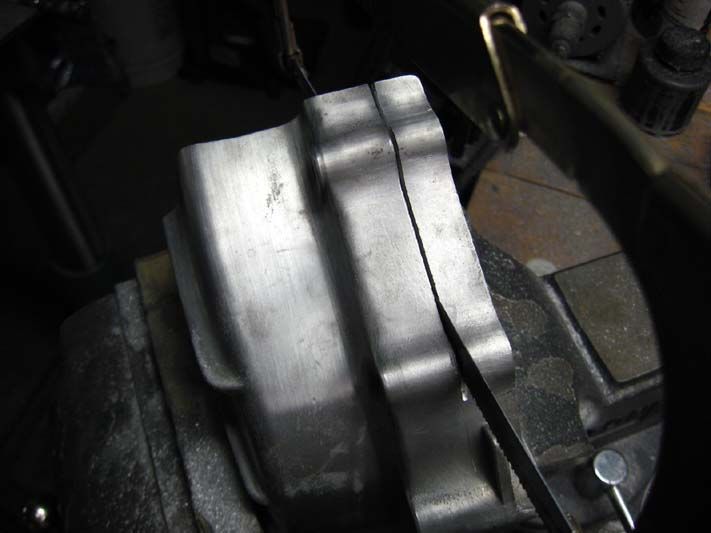
Cover was marked with a sharpie marker, using the stock sprocket cover as a rough template. Clamped in the vise,
a series of cuts ensued using hacksaw and coping saw - cover was repositioned in vise as needed
for cutting access - followed by filing and grinding. Tip - lube the coping saw with bar hand soap periodically.
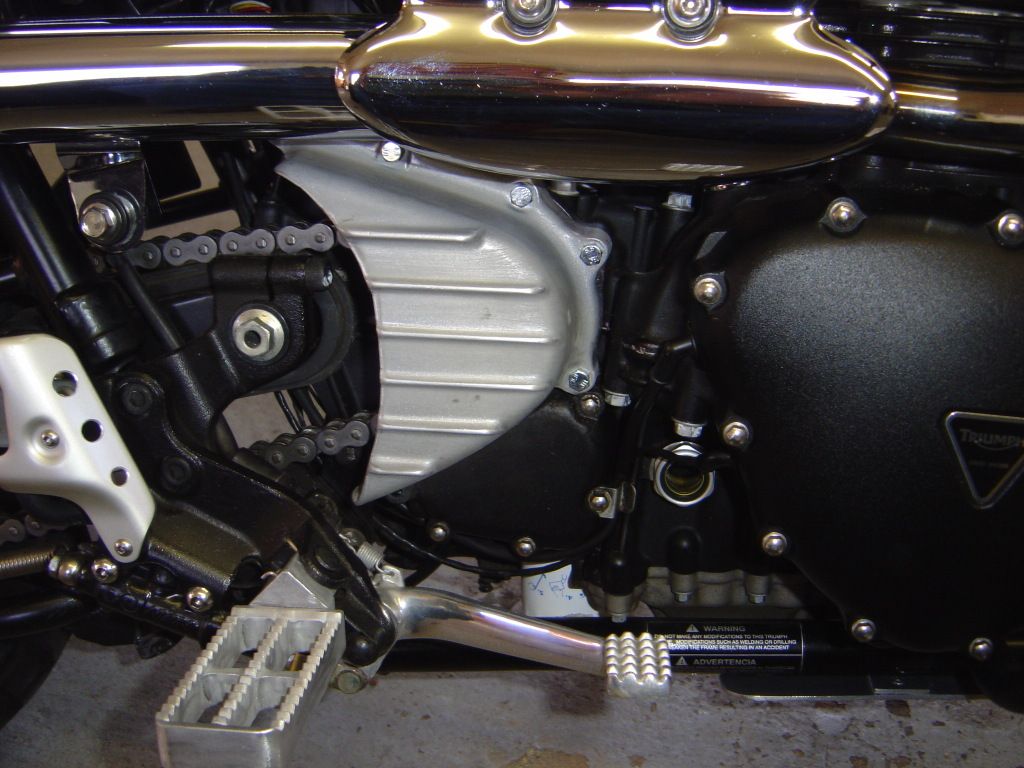
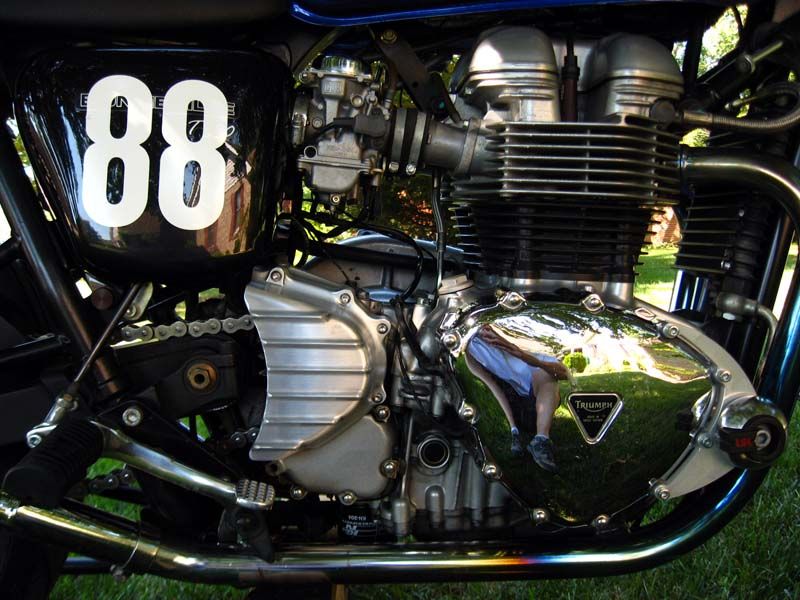
Initial mounting on the bike looked promising, but the overall projection from the engine case and
surface area still seemed overly bulky, still too much cruiser DNA - on a black bike with a black cover, perhaps not as much of an issue.
Revised contour was marked, then back to the vise followed by several more cuts and shaping with the angle grinder,
files and rotary tool. Out of the vise, carefully scribed a line 1/2" in from the existing cover edge, then clamped back in the vise, began
carefully making the side cuts to reduce the overall cover depth. Once complete, checked cut for flatness with a straight
block of wood, filed slightly as needed, rechecked, then filed and contoured fins to blend to finished edge, making
use of a 120 grit flap wheel to smooth all edges.
Back on the bike, the revised shape looks better to me than the first effort... seeing some other design possibilities starting with the same cover.
Fasteners are M6 x 35 button head stainless.
Step-by-step photos
http://s192.photobucket.com/albums/z276/D9davidnyne/Finned Sprocket Cover DIY/
Slideshow
http://s192.photobucket.com/albums/z276/D9davidnyne/Finned Sprocket Cover DIY/?albumview=slideshow
angle grinder, flex shaft tool and grinding burrs, portable drill with flap wheel, safety googles, gloves, ear protection.
If refinishing the cover add aircraft stripper, PVC gloves, coarse and fine scuff pads.
I'd estimate the project difficulty level as moderate.
I started by stripping the cover, with plans to polish and chrome the finished piece. Several applications
of Aircraft stripper were necessary to remove the factory finish, with scuffing required between applications. If
stripping, roughen the surface thoroughly first as the stripper will be more effective.
Cover was marked with a sharpie marker, using the stock sprocket cover as a rough template. Clamped in the vise,
a series of cuts ensued using hacksaw and coping saw - cover was repositioned in vise as needed
for cutting access - followed by filing and grinding. Tip - lube the coping saw with bar hand soap periodically.
Initial mounting on the bike looked promising, but the overall projection from the engine case and
surface area still seemed overly bulky, still too much cruiser DNA - on a black bike with a black cover, perhaps not as much of an issue.
Revised contour was marked, then back to the vise followed by several more cuts and shaping with the angle grinder,
files and rotary tool. Out of the vise, carefully scribed a line 1/2" in from the existing cover edge, then clamped back in the vise, began
carefully making the side cuts to reduce the overall cover depth. Once complete, checked cut for flatness with a straight
block of wood, filed slightly as needed, rechecked, then filed and contoured fins to blend to finished edge, making
use of a 120 grit flap wheel to smooth all edges.
Back on the bike, the revised shape looks better to me than the first effort... seeing some other design possibilities starting with the same cover.
Fasteners are M6 x 35 button head stainless.
Step-by-step photos
http://s192.photobucket.com/albums/z276/D9davidnyne/Finned Sprocket Cover DIY/
Slideshow
http://s192.photobucket.com/albums/z276/D9davidnyne/Finned Sprocket Cover DIY/?albumview=slideshow
Last edited: