Earl's Watsonian '06 Bonnie Black

cafenoir900

VENDOR
Got into a new project... modifying and installing a fairing on a side car equipped '06 Bonnie Black. Lots of things are going to happen to this bike over the next few weeks or months(?), so stay tuned. Here are some pics of the bike and the initial teardown.

So far, we are going to modify the air box, rejet, port the intake manifolds, install progressive springs and pre-load adjusters, install tapered roller head bearings, gaiters, repaint and pinstripe (to match the side car), install a full fairing, and some other little things as we go.

Enjoy and comment!
 

Attachments

  • 081.jpg
    081.jpg
    95 KB · Views: 0
  • 083.jpg
    083.jpg
    94.3 KB · Views: 0
  • 084.jpg
    084.jpg
    94.9 KB · Views: 0
  • 085.jpg
    085.jpg
    93.4 KB · Views: 0

cafenoir900

VENDOR
Second installment

So, after the initial tear down the first things to do relate to beefing up the front end. Replacing the stock fork springs with higher rate progressive springs, adding pre-load adjusters, higher viscosity fork oil, replacing the ball head bearings with tapered rollers, and putting on a fork damper.

Take apart the forks, drain the oil...

Comparison shot of the stock spring (bottom) and new spring (top). You can see that the stock spring is lighter guage wire, and that the windings are further apart and constant dimension. The progressive springs have varied windings and are heavier wire. They are shorter by about 3/4 inch. that will be taken up by the new parts for the pre-load adjusters.

The adjusters are made by drilling a clearance hole for the adjuster screw in the top of the stock cap. We press in a seal, then press in a threaded insert and thread in a stainless cap screw with a deep shoulder, sized for the seal. Screw pads and top washers are used to finish up the parts.

With the new springs and 20 weight oil in the fork legs the adjuster caps are installed and we are ready to reassemble the front forks.
 

Attachments

  • S6301314.jpg
    S6301314.jpg
    62.7 KB · Views: 0
  • S6301310.jpg
    S6301310.jpg
    60.6 KB · Views: 0
  • S6301308.jpg
    S6301308.jpg
    94.2 KB · Views: 0
  • S6301298.jpg
    S6301298.jpg
    92.7 KB · Views: 0
  • S6301307.jpg
    S6301307.jpg
    91.1 KB · Views: 0
  • S6301306.jpg
    S6301306.jpg
    95.6 KB · Views: 0

cafenoir900

VENDOR
Second installment, continued

With the ball head bearings removed, we install the tapered rollers, re-assemble the yokes and slide in the fork legs. We put gaiters on, too.

The next step is the steering damper installation. We devised a damper based on the friction dampers used on old Triumphs. The only modification needed to the bike is to drill the top cap of the steering tube. We put plastic spacers in the top and bottom of the stem tube to center the adjuster shaft. This shaft goes down through the stem, and through a keyed stainless washer, friction washer, stationary friction plate, another friction washer, plain stainless washer, a bellville spring washer (also stainless) and threads into the keyed bottom nut. The stationary friction plate is attached to the bike frame with the horn mounting screw. Damping can be adjusted with the knob on top of the top yoke. Last photo shows the new top yoke layout with the damping adjustment knob and the pre-load adjusters.
 

Attachments

  • S6301331.jpg
    S6301331.jpg
    78.8 KB · Views: 0
  • S6301330.jpg
    S6301330.jpg
    92 KB · Views: 0
  • S6301325.jpg
    S6301325.jpg
    94.8 KB · Views: 0
  • S6301315.jpg
    S6301315.jpg
    95.2 KB · Views: 0
  • S6301319.jpg
    S6301319.jpg
    93.4 KB · Views: 0

Shiner

Scooter
Keep the pics coming. Like the creativity of going old school with the damper. further explaination of the mounting of the friction plate would be appreciated. Todd in Cincy
 

cafenoir900

VENDOR
More on the Bonnie...

Hey, thanks for the comment... I wasn't sure anyone was watching....

I'll be getting the steering damper ready for sale soon... should be about $150 for the kit.

We've completed modifications to the airbox, and started the re-jetting process.

First, I ported the intake manifolds... smoothed out the inside and reduced any areas that would cause less than smooth flow into the cylinders.

Instead of removing the airbox, we decided to remove the restrictor plate and snorkel, open up the right side of the box and modify and install a high flow Uni air filter.
 

Attachments

  • m_4d8f6bdcf69441ce83c7ba9af9681117.jpg
    m_4d8f6bdcf69441ce83c7ba9af9681117.jpg
    4.5 KB · Views: 0
  • m_20ab30b4eb5b461c8dceac57cc1a16ef.jpg
    m_20ab30b4eb5b461c8dceac57cc1a16ef.jpg
    9 KB · Views: 0
  • m_4013acebf4114997a6053815632f3680.jpg
    m_4013acebf4114997a6053815632f3680.jpg
    5.9 KB · Views: 0
  • m_dff3317e25124c039da6cf6a08c142e6.jpg
    m_dff3317e25124c039da6cf6a08c142e6.jpg
    4.9 KB · Views: 0
  • m_47d0a69c5d6044399c194670aa25f10b.jpg
    m_47d0a69c5d6044399c194670aa25f10b.jpg
    5.5 KB · Views: 0
  • 003.jpg
    003.jpg
    94.4 KB · Views: 0

Shiner

Scooter
Great creativity, can't wait until the pieces all start coming together for you. todd in cincy
 

BornAgain

Scooter
I like the steering damper kit real old school. How would it stack up against one of the side mounted oil dampened kits like the one Norman Hyde sells?
 

cafenoir900

VENDOR
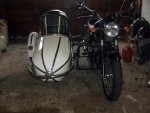
More on Earl's Bonnie

Well, it's done and delivered. I will make a few more posts to bring you all up to date.
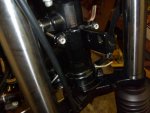
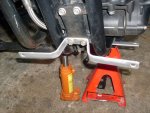
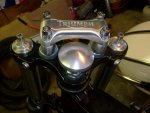
As far as the steering damper is concerned, it seems to work perfectly. It's easy to adjust and really, really helps with the front end shake that comes with having a side car. I personally don't have a great deal of experience with side car "driving," but I know how it was before the damper and I know how it is with the damper... WAAAYYY better!
I can't say how it stacks up (pun intended) with the cylinder or top mount hydraulic type, having never experienced these for myself, but this friction one does work, and there is nothing hanging off the bike... just an attractive aluminum knob at the top yoke. Cost is less than others, too.
Earl's impression? "better than expected," and "never went 105 with a side car before."
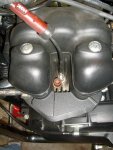
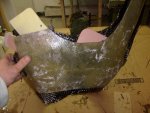
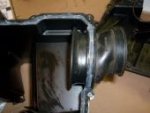
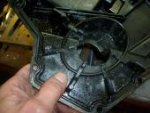
A note to those of you who might be interested in the airbox mods... when you open the right side and the right side of the air filter, you have to add a gasket between the filter and box body... I used foam headliner material and glued it to the filter. I have a photo of it somewhere, but can't find it just now.
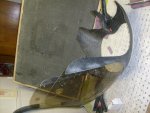
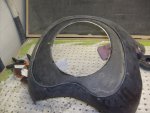
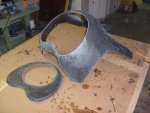
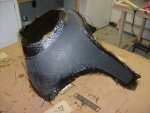
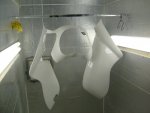
I'm going to go over the tuning process first, then the fitting of the fairing brackets and rough fit up, then painting and final assembly.

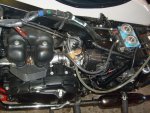
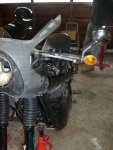
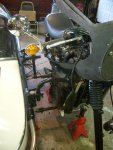
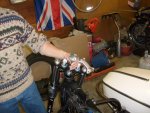
Tuning... here are photos of the set up.

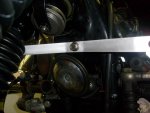
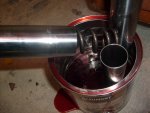
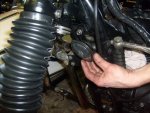
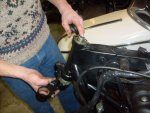
First is the auxiliary tank installed... I use an inexpensive coolant overflow tank (@ 10 bucks as opposed to $65 for an "official" one). Next is the vacuum synchronizer in place and the Gunson's Color Tune. The Color Tune is a replacement "spark plug" that allows you to see the color of the ignition flame inside the cylinder as the motor runs. By checking the color of the flame - yellow= rich, blue=good, white=lean - at various rpm ranges, it gives you an idea of what jet and needle adjustments have to be made to get even accelleration and no flat spots. I make adjustments to one carburettor, then set up the other the same way. Then adjust the synch, and replace the balance tube. A balance tube attaches from one vacuum spigot to the other on the intake manifolds. This is something that was done on older twins... it still seems to add some torque over a non balance tubed carb set up. I don't know how it works with 270 cranks, however... anybody have some experience with this?

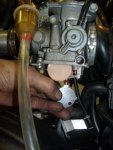
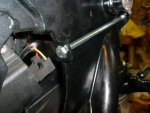
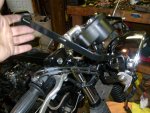
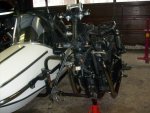
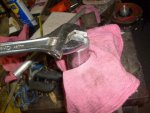
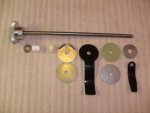
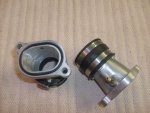
We installed stainless socket screws on the bowls and diaphragm covers when the carbs were off the bike. As you can see from the photos having these in place makes getting to the internals on the carbs way easier for tuning. Try removing and replacing a bowl with the stock Phillips head screws. Many swears ensue.

With the airbox mods, the carbs were adjusted from 126 mains and no shims to 135 mains and 2 shims, 2 1/2 turns on the air screws.
 

Attachments

  • earlsbonnie 115.jpg
    earlsbonnie 115.jpg
    86.6 KB · Views: 0
  • earlsbonnie 116.jpg
    earlsbonnie 116.jpg
    85.4 KB · Views: 0
  • earlsbonnie 113.jpg
    earlsbonnie 113.jpg
    97.2 KB · Views: 0
  • earlsbonnie 114.jpg
    earlsbonnie 114.jpg
    95.9 KB · Views: 0
  • earlsbonnie 112.jpg
    earlsbonnie 112.jpg
    94.2 KB · Views: 0

cafenoir900

VENDOR
Earl's Bonnie...fairings

So, The Fairings... from layup to fitup, in afew installments.

First shows the front fairing cowl coming out of the mold. Next is the rough fairing showing the trim that needs to be done. Third is the front cowl in rough trim, with the front mounting plate that surrounds the headlight and sandwiches the nose cone to the the cowl. Next you can see the plate and cowl drilled and fitted together. the space between is where the nosecone fits. Finally, the windscreen is fitted and drilled.
 

Attachments

  • earlsbonnie 102.jpg
    earlsbonnie 102.jpg
    91.8 KB · Views: 0
  • earlsbonnie 103.jpg
    earlsbonnie 103.jpg
    93.3 KB · Views: 0
  • earlsbonnie 008.jpg
    earlsbonnie 008.jpg
    93.6 KB · Views: 0
  • earlsbonnie 006.jpg
    earlsbonnie 006.jpg
    94.7 KB · Views: 0
  • earlsbonnie 004.jpg
    earlsbonnie 004.jpg
    92.1 KB · Views: 0

cafenoir900

VENDOR
Earl's Bonnie...fairings, brackets

Here is a description of how the fairing brackets go onto the bike...

Starting from the bottom up, the rear lower bracket goes on using cushioned stainless steel clamps. The clamps wrap around the lower frame tubes giving a firm, but flexible grip that won't mar the frame. Next the lower front bracket picks up the lower brace plate mounting holes. The lower screws come out, the bracket goes on, the original screws go back in and are left a bit loose at this point. It's important to leave all the brackets (except the head bracket) a little loose at this point... it makes lining up the fairing panels easier later on. The upper front bracket uses the horn mounting screw. The head bracket attaches to the head tube using two long screws and a strap around the back of the head gusset. Once this is in place it can be tightened securely... it will be the starting point of the fairing alignment process. The bracketry is all designed so that no modification to the frame is required.
 

Attachments

  • earlsbonnie 099.jpg
    earlsbonnie 099.jpg
    86.9 KB · Views: 0
  • earlsbonnie 097.jpg
    earlsbonnie 097.jpg
    83.9 KB · Views: 0
  • earlsbonnie 093.jpg
    earlsbonnie 093.jpg
    76.9 KB · Views: 0
  • earlsbonnie 090.jpg
    earlsbonnie 090.jpg
    95.5 KB · Views: 0
  • earlsbonnie 088.jpg
    earlsbonnie 088.jpg
    66.1 KB · Views: 0
  • earlsbonnie 087.jpg
    earlsbonnie 087.jpg
    77.8 KB · Views: 0

cafenoir900

VENDOR
Earl's Bonnie...fairings, brackets, part 2

The upper rear bracket goes on with cushioned clamps, and mounts to the 1 1/4 diameter engine supports. Next we install the headlight supports, the headlight shell, and front fairing supports including the front plate supports and the upper windscreen supports. Note that the stock headlight mounts were removed along with the turn signals earlier in the process.
 

Attachments

  • earlsbonnie 120.jpg
    earlsbonnie 120.jpg
    93.1 KB · Views: 0
  • earlsbonnie 119.jpg
    earlsbonnie 119.jpg
    75.2 KB · Views: 0
  • earlsbonnie 118.jpg
    earlsbonnie 118.jpg
    95.9 KB · Views: 0
  • earlsbonnie 095.jpg
    earlsbonnie 095.jpg
    94.5 KB · Views: 0

cafenoir900

VENDOR
Earl's Bonnie...fairings, brackets, part 3

Let's see... where was I?
Oh, yeah, fairing brackets on... Since this bike has a side car, we had to make some custom trims on the right side of the lower fairing. We fitted up the fairing in a raw state, and made all the trims and holes. Once this was done, the fairing was prepped and painted. In the mean time we had painted all the body parts. Photo shows the parts wet sanded after clear coat and ready for three stage buffing. Next photo shows the color coat on the fairing.

Final shots of the bike completed follow.

I am having trouble loading pics, see the next post....
 

cafenoir900

VENDOR
Here are the photos for the last post...

Note the custom work on the bars. We used some reconditioned BMW bar end turn signals for the project and made some not quite bar end mirror mounts to go with them. Changed the original grips to Bestons.
 

Attachments

  • earlsbonnie 106.jpg
    earlsbonnie 106.jpg
    95.6 KB · Views: 0
  • earlsbonnie 109.jpg
    earlsbonnie 109.jpg
    92.4 KB · Views: 0
  • earlsbonnie 110.jpg
    earlsbonnie 110.jpg
    79.1 KB · Views: 0
  • earlsbonnie 111.jpg
    earlsbonnie 111.jpg
    59.9 KB · Views: 0
Top