Bonnie's Facelift

B06Tang

Cafe Racer
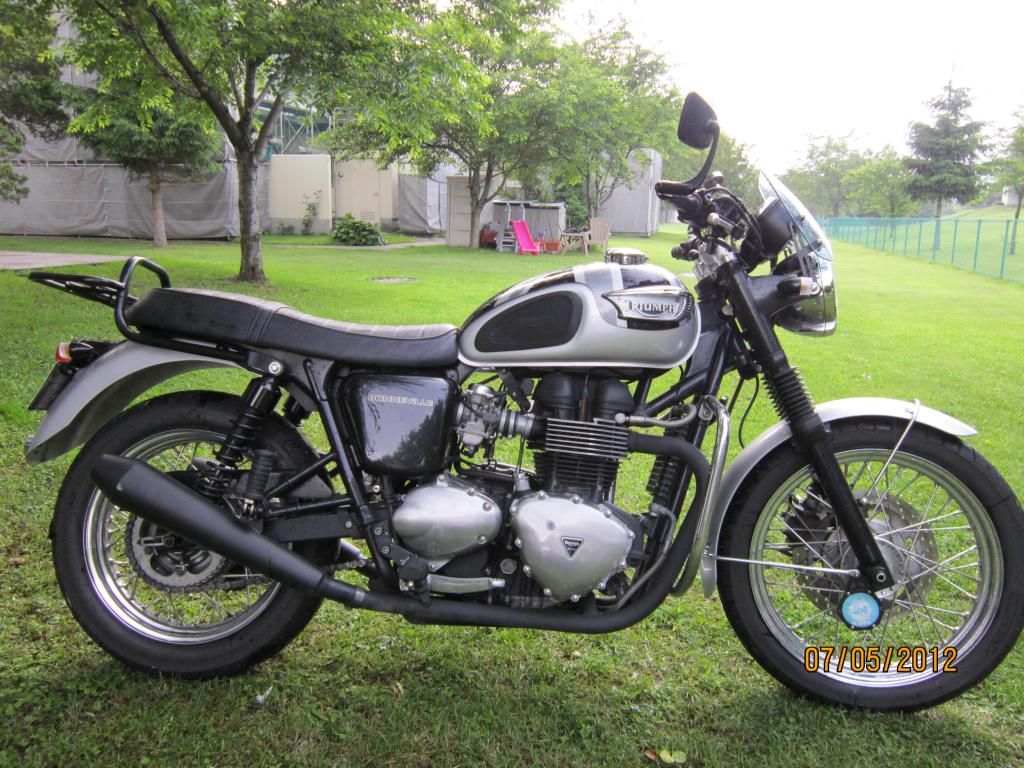
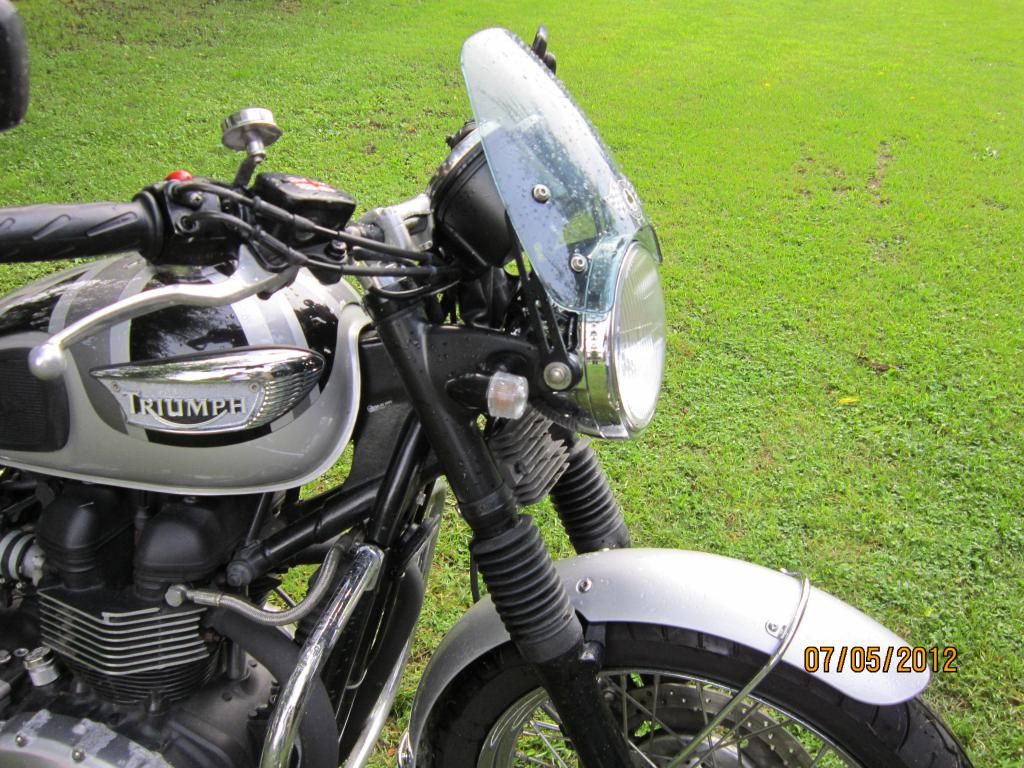
Well the weather has turned and people are rolling out on their two wheels. My riding season is going to be somewhat limited this season due to circumstances so I decided to give Bonnie a little facelift. The next best thing to riding for me, is being around the bike with a wrench in my hand. So with that said, here is what I have either done already or will be getting done.

1. Oil & filter change
2. Spark plugs
3. Valve clearance checks
4. New clutch plates & springs
5. New front fork springs & oil flush/change
6. Replace head bearings
7. Bleed brake lines with new pads
8. Change tires
9. Strip front & rear fenders down, prep them and then paint black base paint with a 1" silver racing stripe down center and pinstripe gold where the black and silver lines meet
10. Pull off timing, sprocket & clutch cover and strip them down and then wet sand them to a natural polished aluminum look.

I have started off with doing the covers to time it with the oil change, valve clearance checks and the fact that the weather can still get shitty so I can wet sand at the kitchen sink...one day I will have a garage but just not yet:(

Riding the Hokkaido coastline for 5 days straight & the weather here in Japan has completely wrecked my covered and that lacquer crap finish that was on them. For example:

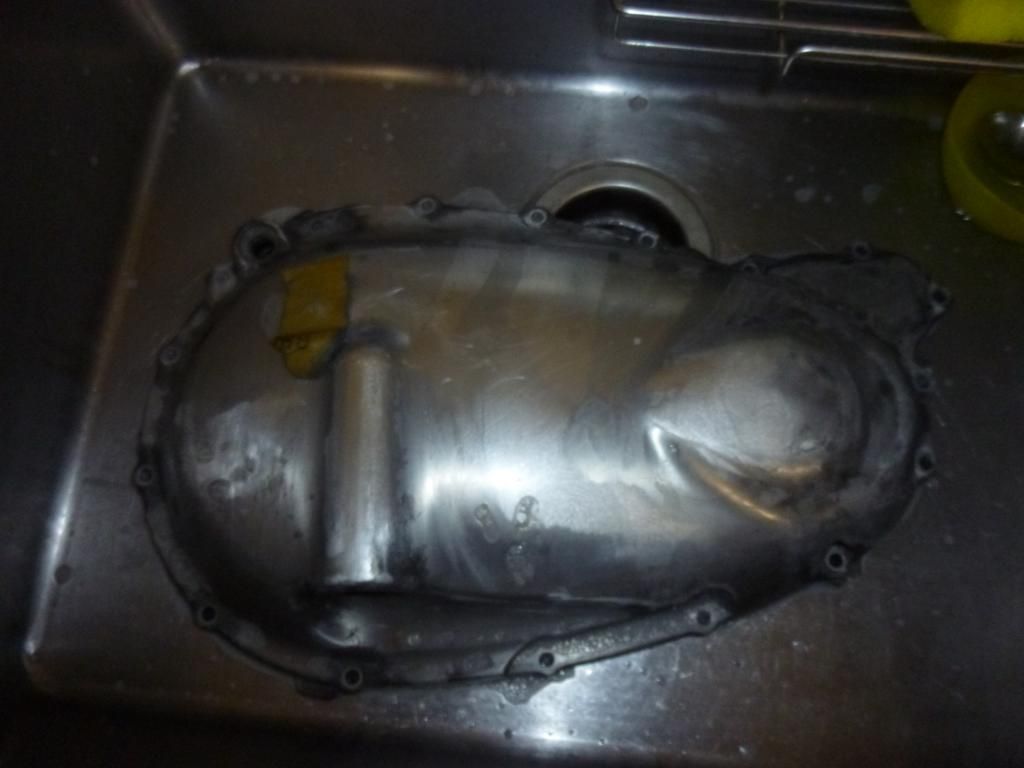
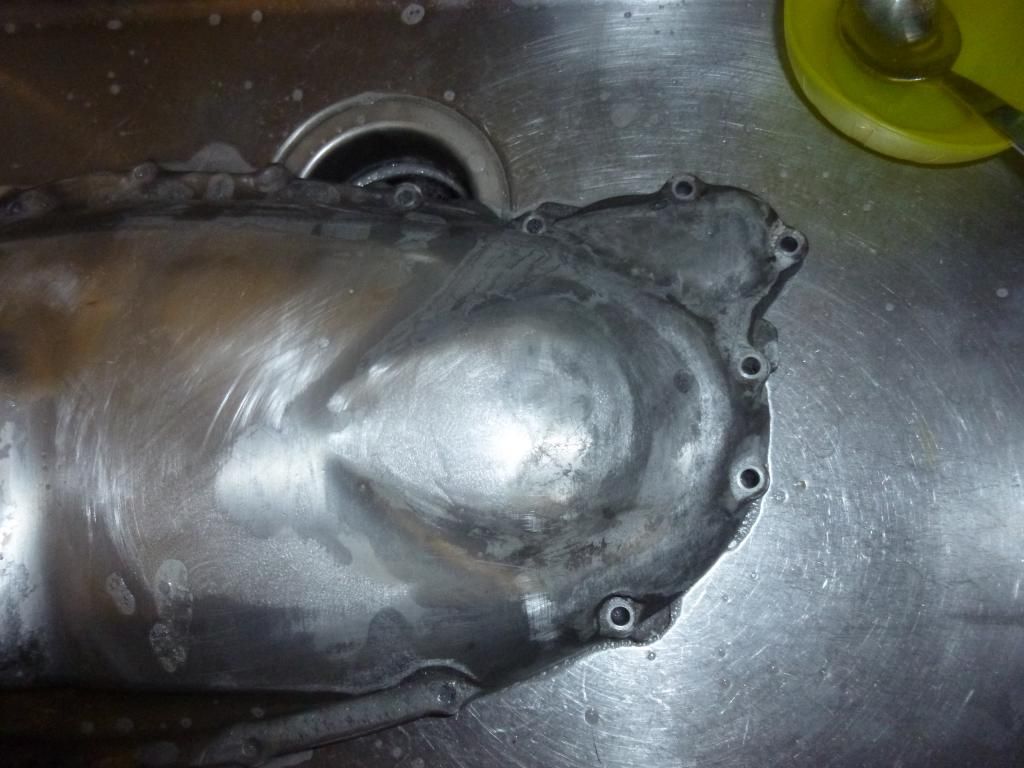
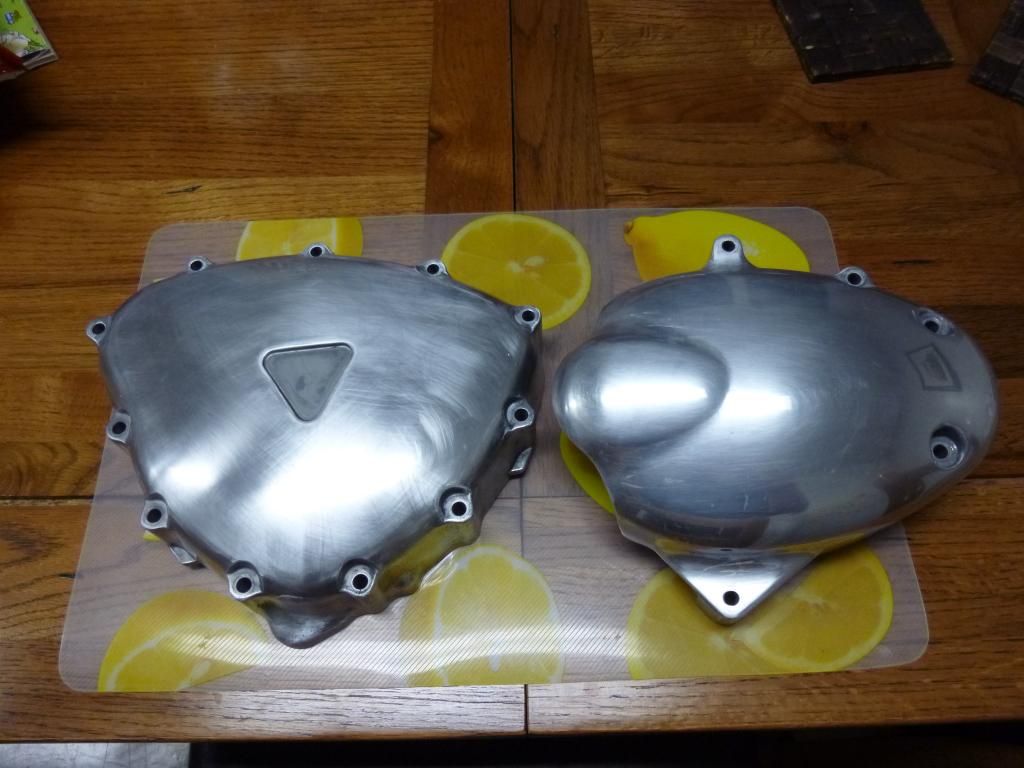
You can see how bad the corroding is on the clutch cover and trust me...the photo masks a lot of the ugliness:

IMG_1120_zps77cbbc7b.jpg


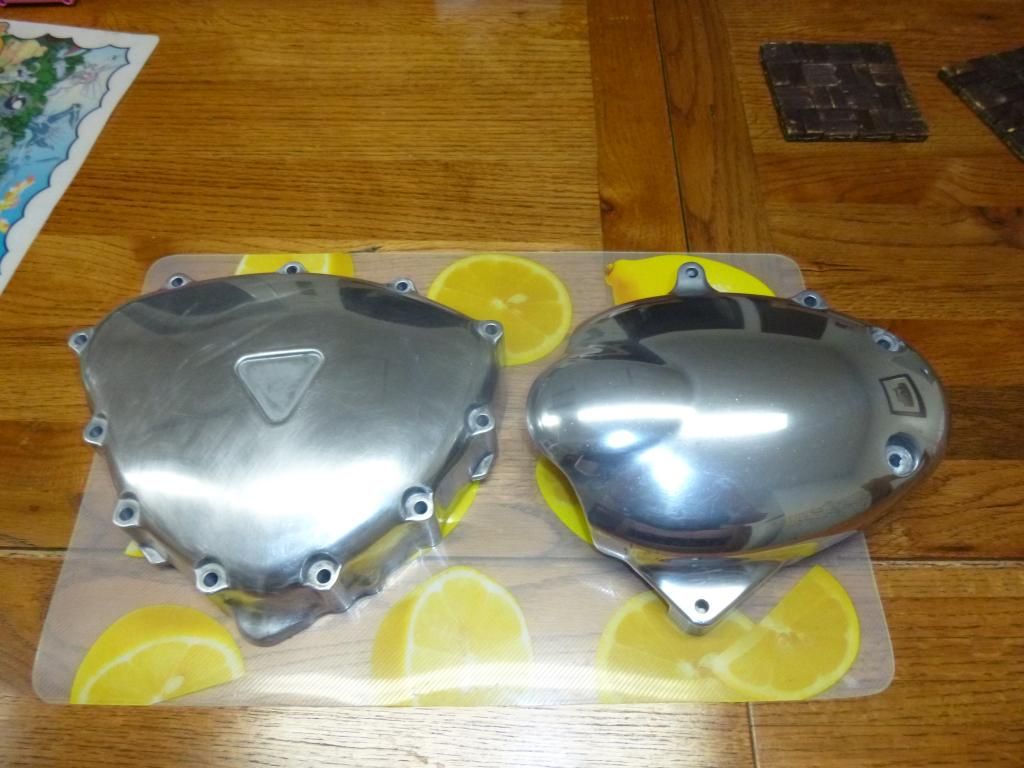
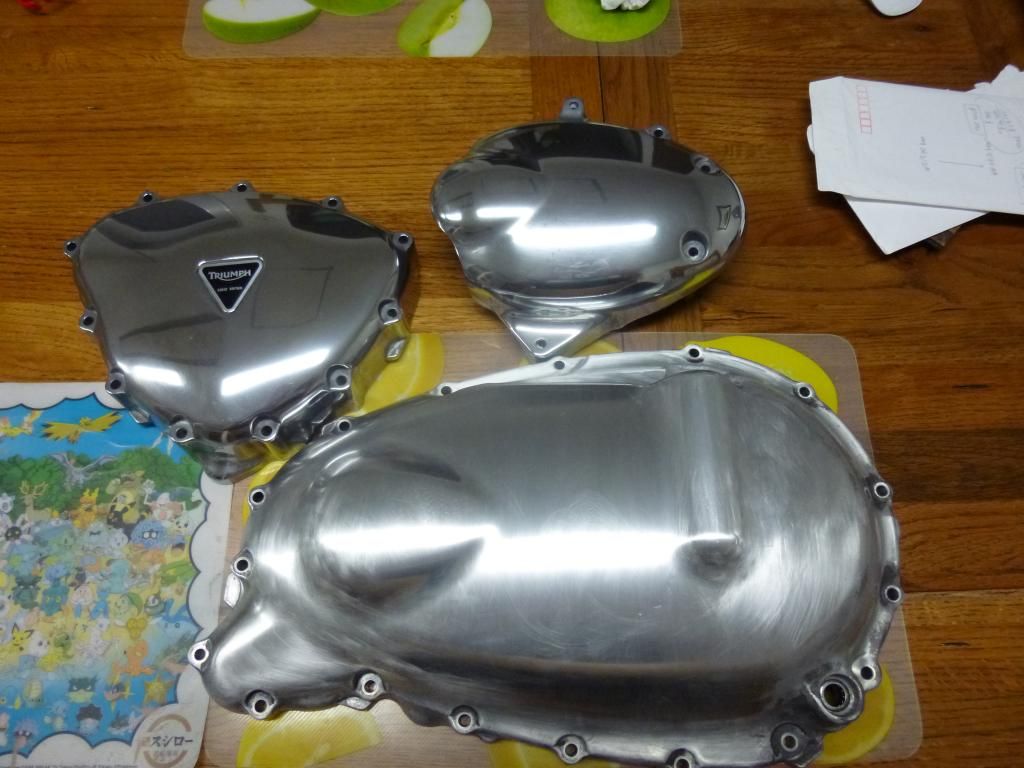
Timing & sprocket covers:

IMG_1121_zpse1a14858.jpg


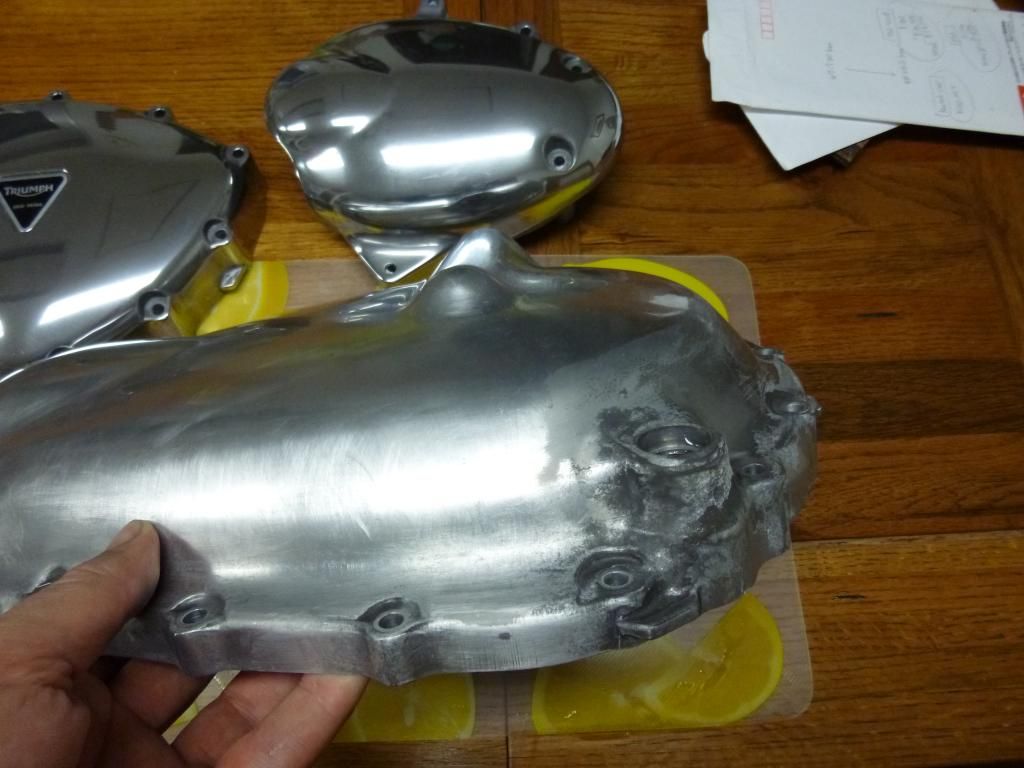
Check out bottom of the picture/top side of the timing cover and how chewed up these covers got on me:

IMG_1122_zps7e21aff1.jpg


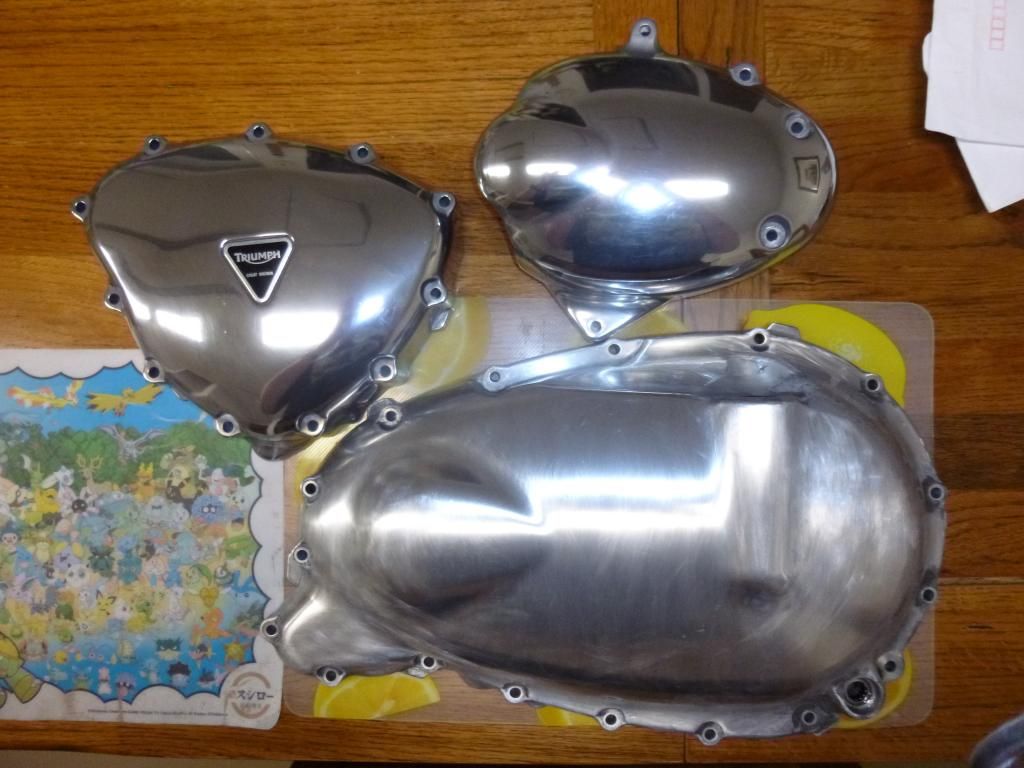
So now I pulled the timing and sprocket covers and have gone to work on them. I stripped them using easy off oven cleaner then sanded with 400 and then sanded with 600, 800, 1000, 1200 & 2000. After that is done, then seal them up with an aluminum polish/sealer and on my buffing wheel.

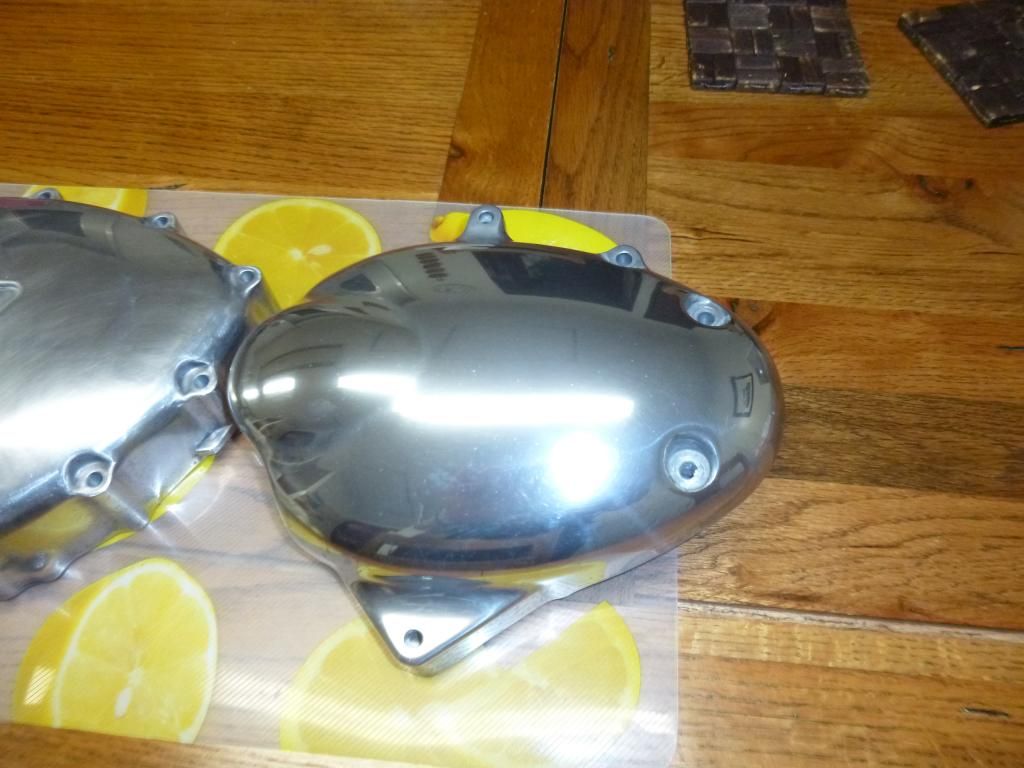
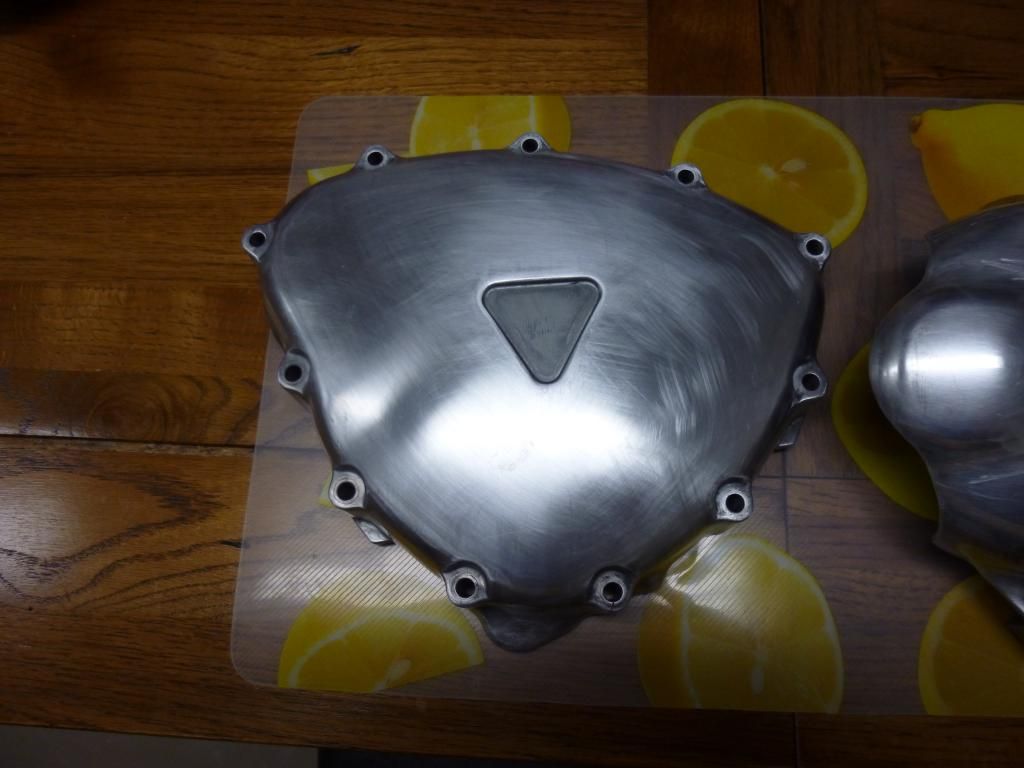
I have about 9 hours of wet sanding on the sprocket and have finished all sanding and need to go on to the buffing wheel:

P1010325_zps4cbeb826.jpg


P1010326_zps68cbc62b.jpg


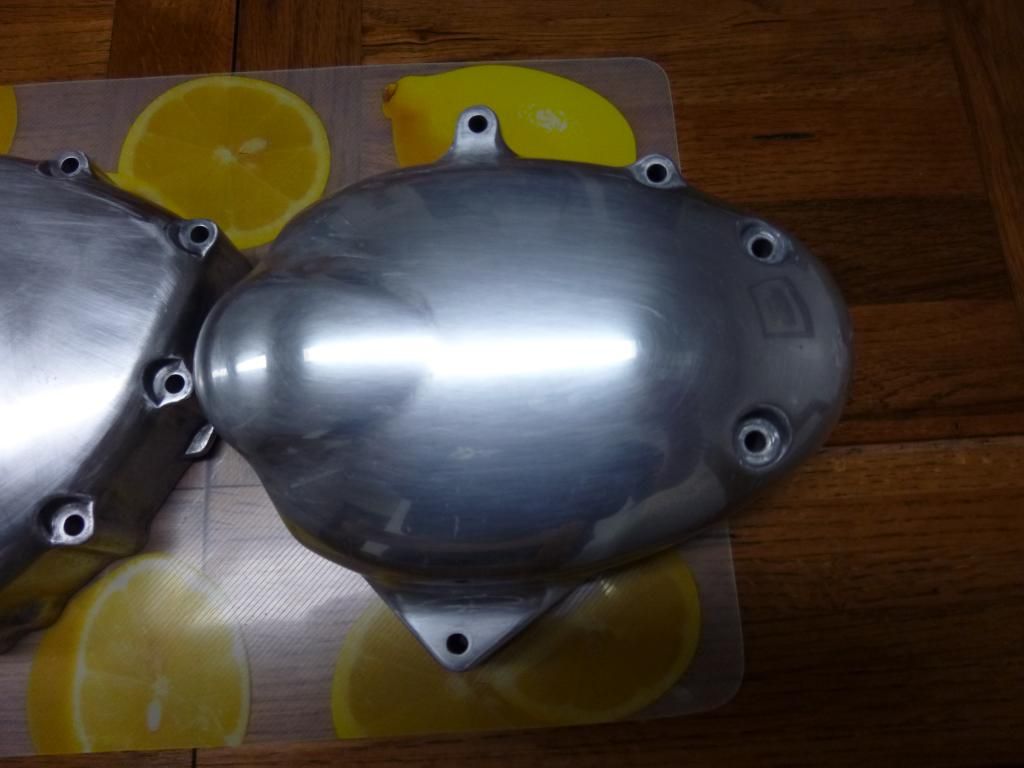
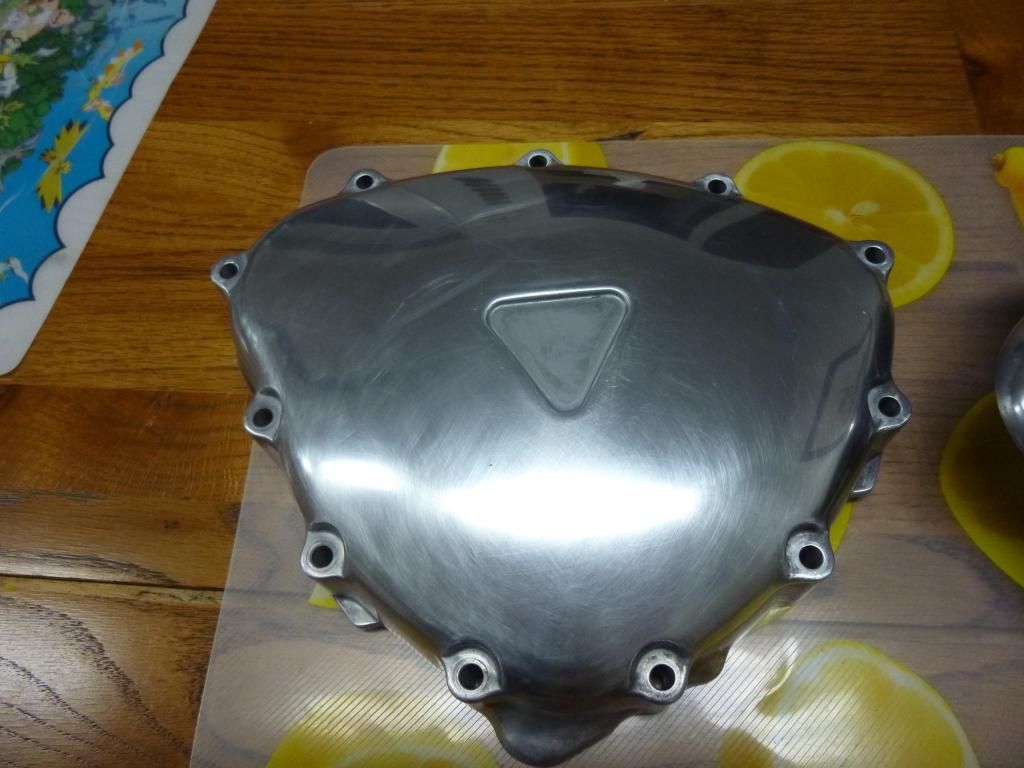
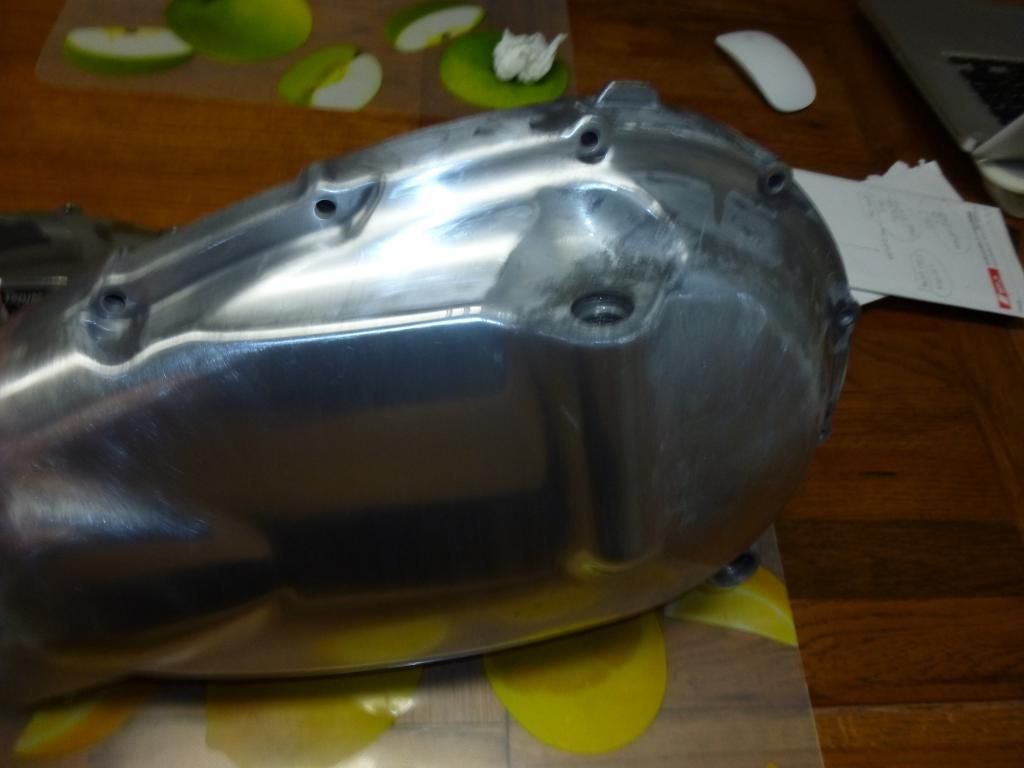
I have only got up to 1000 on the wet sanding for the timing cover. Two more levels of wet sanding and then off to the buffing wheel. I have about 12 hours on this cover so far:

P1010327_zps448e93f7.jpg


That is about it so far but I am going to use this to continue my work in progress. My hope is to have a finished product that is geared more to the running side of the bike but with subtle/older style cosmetic changes to her. Low cost but pretty high labor intensive which is exactly what I need to right now. Believe it or not, the hours upon hours of wet sanding has been real relaxing. Anyways....there you have it! More to come...:beer::finger2:
 
Last edited:

neuroboy

750cc
nice.

oh man, yeah. Boston's just about ripe, too. . . my spring cleaning is
upgraded front and back suspension (KYBs and progressive fork springs),
new pazzo levers,
ignition relo,
tommaselli clip-ons (thanks DrLapo for the reservoir bracket plug!),
bar-end mirrors,
and I might put the rear fender back on (NB FEK is on there now and probably won't accommodate my new givi hard bags for the VT trips this summer).

even without the baubles, every spring it's like i have a new bike all over again.
 

JimmyR

Street Tracker
Southern hemisphere here - enjoying the cooler weather now! In the last week I've pulled out the leather Schott jacket to wear while riding again. We ride all year 'round here, but damn it gets hot in summer. Even my mesh jacket gets hard to wear sometimes.

This time of year is beautiful for riding. But I'm still working on the bike. You are doing good work there B06Tang. Keep posting the pics. I really enjoy your shots of Japan.
 

B06Tang

Cafe Racer
You are doing good work there B06Tang. Keep posting the pics. I really enjoy your shots of Japan.

Thanks JimmyR, I appreciate that and will definitely keep posting up the progress. Fortunately I picked up a spare of fenders for cheap on this forum so I will be able to work on them and ride at the same time. My riding is going to be limited because of what is going on but I will get out. Here is what my plans are and I will of course be sharing with photos & videos. I am in the Tohoku region of Japan and live up in Aomori prefecture. I am the red square above the "i" in Aomori. My goal is to roll through all of the Tohoku region this year. As of now, I have all of Aomori coastline, Akita, and Iwate done. I also did Hokkaido on a five day trip which is directly above Aomori. So this year I am looking to get through Yamagata, Miyagi and Fukushima. Of course I am limited on Fukushima because the military has a real strict "no enter" zone for that prefecture so I will have to run the Yamagata coastline on the west side on the Sea of Japan and dip into Fukushima on the east side. One thing about Japan, the weather gets warmer and the elevation gets even more intense through the central part of the county so it should be a blast!

Tohoku_zps5c716357.jpg
 
Last edited:

JimmyR

Street Tracker
I saw all of your posts on Hokkaido. Sigh. One day I will get there! Be careful around Fukushima. Tragic what is going on there. And ironic that a US serviceman should be a red square.
 

B06Tang

Cafe Racer
More Done

I got some hours in on the covers. I got the sprocket cover polished out and all of the wet sanding done on the timing cover. The clutch cover got pulled today and stripped down the fenders to prep them for priming and paint. I am really happy how the sprocket cover buffed out and think having natural aluminum covers is the way to go.

Timing cover with wet sanding done & sprocket cover buffed out:

P1010328_zps8dc97754.jpg


Nice & Shiny:

P1010329_zps77f9a31c.jpg


Wet sanding finally done - about 16 hours in total:

P1010330_zpsa8cbb7fb.jpg


Just got started on the clutch cover - this is going to be the longest one to do:

P1010331_zps67679f35.jpg


P1010332_zps7f727bed.jpg


I get these covers done then it is new springs, new clutch plates, new clutch line, button up the clutch cover. Pull the cam cover and run the valve clearances and then button up the timing cover. Then on to the fork for new seals, springs, oil and head bearings and at night time I will be wet sanding the the fenders for prep. I think I am going to leave the stock length. I have been thinking about it a lot and I like the round bar on the front and kind of like the older style looking fender that runs over the wheel. Plus I am known to ride in shitty weather and function is definitely a key factor. Either way...a little Flogging Molly in the back ground and I venture on! Next best thing to riding...:beer: :finger2:
 

B06Tang

Cafe Racer
Scrub-a-dub-dubby!

The wet sanding continues on but progress is slowly showing! I got the timing covering buffed out to a glass-like shine and now have about 14 hours of wet sanding on the clutch and still just on the 600 grade sand paper! This cover was beyond moshed out but I'm making headway!!

P1010343_zps6699bf9d.jpg


P1010344_zpsd7d1b181.jpg


P1010345_zpsa7dab955.jpg


P1010346_zps8a81f848.jpg
 

B06Tang

Cafe Racer
Covers are finally done! Holy shit! Took time but I am loving the look. Clutch holding plate came in and hopefully my impact driver arrives tomorrow..the bike is now getting put together. I started making a bunch of how-to videos as I do stuff on the bike. Here is how to put the plate tool on if anyone gives a shit to have look...more to come

http://www.youtube.com/watch?v=4AlQgtAyb50
 
Great video, Matt. Looking forward to seeing the rest. I'm going to be changing out my clutch plates here in the not too distant future as well. Maybe I'll just wait until you get stateside. :snack::beer::lol3:
 

Twodogs

Street Tracker
What you have done looks fantastic isn't polishing alloy the hard way fun, and I say that with a sarcastic tone. I did up a 1988 Honda CR250 polishing every bit of alloy on that bike and twenty years of being treated as a motocross bike had not been kind to any of it. At one stage I basically had no finger prints so I started wearing gloves when sanding. Some alloy metals polish up better then others the rims and other alloy bits on my thruxton ( I cheated and fitted all chrome T100 covers) didn't seem to have the same deep polish look that the Honda parts did and the Honda seem to be a lot more easier to do (even though I worked out I spent 30 hours on the front rim only to find some hairline cracks which meant finding another rim and starting again).
 

Twodogs

Street Tracker
Covers are finally done! Holy shit! Took time but I am loving the look. Clutch holding plate came in and hopefully my impact driver arrives tomorrow..the bike is now getting put together. I started making a bunch of how-to videos as I do stuff on the bike. Here is how to put the plate tool on if anyone gives a shit to have look...more to come

http://www.youtube.com/watch?v=4AlQgtAyb50

Why are you changing the clutches??
 

B06Tang

Cafe Racer
What you have done looks fantastic isn't polishing alloy the hard way fun, and I say that with a sarcastic tone. I did up a 1988 Honda CR250 polishing every bit of alloy on that bike and twenty years of being treated as a motocross bike had not been kind to any of it. At one stage I basically had no finger prints so I started wearing gloves when sanding. Some alloy metals polish up better then others the rims and other alloy bits on my thruxton ( I cheated and fitted all chrome T100 covers) didn't seem to have the same deep polish look that the Honda parts did and the Honda seem to be a lot more easier to do (even though I worked out I spent 30 hours on the front rim only to find some hairline cracks which meant finding another rim and starting again).

I am SUPER stoked with how my covers came out. It was kind of a forced decision for me to do because that lacquer finish really got chewed up over here. I contemplated having them powder coated but there isn't any service like that where I am at so I thought I would try to the old school way and get to work. I have well over 24 hours in wet sanding on all three covers combined but they are like glass now! I think it looks a shit ton better than chrome. I polished them up with a real thick layer of metal polish cream and then I buffed them out with a thick coat of wax. I am kind of experimenting to see what lets them hold up the best. I do NOT plan on pulling these covers every season to do this kind of work. They will be cleaned, polished and buffed while still on the bike after this but I really do like this finished product.

Why are you changing the clutches??

A few reasons:

#1 It is a 2007 and the first time this cover has ever been opened as far as I know (this is my third year of ownership).

#2 I am pretty demanding on my bikes and ride rather aggressively

#3 I'm 6'5 @ 230 pounds and I put about 20,000 miles in a six month riding season

#4 It started to feel a little sluggish in 4th and 5th towards the end of the season last year.

Finally, the cover was coming off because of the condition they were in so the timing was there to do it. I definitely wanted to go with the green springs because of what I just stated and I felt that I might as well do the plates too. I'm also putting a new clutch cable on it and I will throw the one on it now in my bag in the event I ever have a road side emergency. Plus...with every thing going on personally with me...I doubt I will be able to put the miles on me Bonnie that I normally do so it is a nice substitute to at least wrench on it with some tunes playing in the background.
 

B06Tang

Cafe Racer
Sunny days and my impact driver came in! I got the final buffing on the covers done and took off the clutch to get to the plates. To my surpise, the plates were rockin' good still! Oh well...I thought for sure they would need swapping out. Here is a video of it if anyone wants to see what that part of their bike looks like

http://www.youtube.com/watch?v=cN6gResRpu4
 
Another killer video, Matt. One thing I've found that YouTube lacks are instructional videos of our modern Bonnevilles. And for those that have not seen the insides of their cases before, it takes the mystery out of it and shows that it really isn't rocket science. Provided you can read and understand an owner’s manual... A lot of times I'll read, watch and run thru the process several times in my head before I crack the first bolt.

Thanks for taking the time to shoot it and post it up. I know it's challenging to shoot videos when you want to just get in, fix it and get out again.
 
Last edited:
Top